Whenever you crave an espresso, what do you do? If you answered, I rush to the nearest barista, then this post is certainly for you!
Making great espresso is challenging, and for some, it’s nearly an impossible task. What if I say preparing great-tasting espresso is easier than you think!
No, I’m not kidding, all you need is a good recipe and the right steps to achieve a cup filled with delicious espresso.
Most folks think making espresso requires an Italian espresso maker, but that’s not the case here. This article covers several recipes you can use to prepare espresso. Whether you have an espresso maker or not, you can make espresso at home.
What is Espresso?
I don’t want to burst the bubble of excitement, but before I start explaining the steps to make palatable espresso, it’s important to know what espresso is.
Made using hot water and coffee beans, espresso is a highly concentrated drink that contains higher amounts of caffeine. Usually made with espresso makers, the coffee requires coarsely ground coffee beans with steamy-hot water that extracts the flavor from the grounds.
The resultant you get from the coffee maker has a thick layer floating on the top. Known as crema, the top layer is hard to achieve when using alternative methods to brew coffee.
The flavor of the coffee varies from barista to barista since there is a pressure difference everywhere. The flavor will vary depending on the method you choose, but I can assure you can make espresso at home with this guide.
Let’s get started:
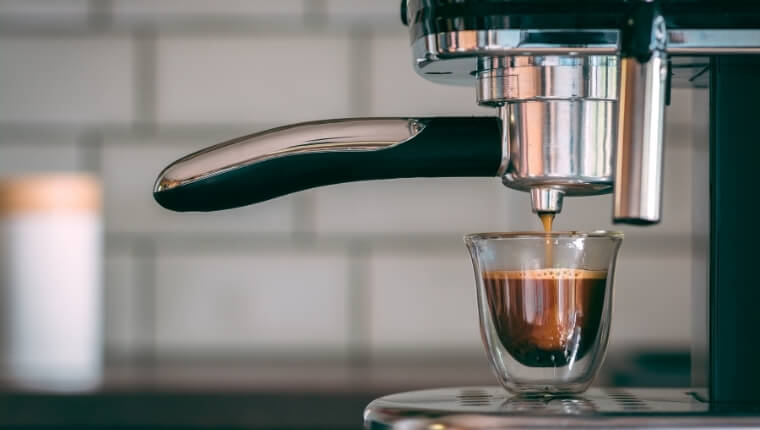
How to Make Espresso with an Italian Espresso Machine?

For those who own an Italian espresso machine, making espresso is the easiest. No need to worry about the crema, as you can achieve it with perfection.
Here are the nine easy steps to brewing espresso using an espresso maker:
Step 1: Clean the Portafilter Thoroughly
Start with cleaning the portafilter thoroughly. Make sure that the portafilter is completely clean and dry before you dose the ground coffee. The leftover moisture can make the coffee taste unpleasant and sometimes horrible.
Use tissue paper to clean the filter, as tissues absorb the moisture quickly.
Step 2: Dose the Coffee Correctly
This is pretty easy, thanks to the on-demand coffee bean grinders. Just add the beans to the grinding machine, turn it on and wait for the beans to get coarser. Now put the coffee grounds in the portafilter for dosing and get ready for some action. (pro tip: for perfect espresso use 7 to 9 grams of coffee)
Step 3: Distribute the Grounds Properly
If you want to enjoy the real flavor of espresso, then it is essential to distribute the grounds properly. When you dose the grounds in the portafilter, it’ll look like a pyramid. It is essential to flatten the coffee ground coffee evenly to brew great-tasting espresso.
I don’t use any distribution tools, but you can use them if required. Tap the portafilter on your palm multiple times to make the ground coffee look even.
Step 4: Tamp It Consistently
Merely tapping the portafilter on your palm won’t help in distributing it evenly. What you need is a tamping device to tamp the grounds properly.
The objective behind tamping the ground coffee is to remove the air pockets to brew espresso perfectly. Keep tamping the coffee until the puck becomes horizontal and there aren’t any uneven layers as they can result in channeling.
Step 5: Clean the Group Head
Some folks get too excited and put the portafilter in the group head without cleaning it properly. Give the group head thorough cleaning by rinsing it properly. A clean group head will help you extract the flavor.
Also, the head gets heated properly when it is clean, and there isn’t any leftover coffee sticking to it.
Step 6: Put the Portafilter in the Group Head
After cleaning the group head, put the portafilter inside it right away. If you don’t put the portafilter inside the group head immediately, then it can lead to burning the coffee, and you may taste some bitter notes.
Step 7: Keep Note of the Yield and Brew Time
It is essential to keep note of the yield and brew time when preparing espresso using an espresso maker. If you don’t keep a note of the brew time, then it can result in over-extraction or under-extraction, which impacts the flavor drastically.
Keep looking at the consistency of the espresso coffee. If it is running too fast, then it’s a sign that the coffee will be watery.
Step 8: Serve It Hot
Espresso tastes great when it is hot, so make sure your guests taste it piping hot. It would be great to show little creativity when serving the coffee. Tell your guests about the coffee and how you prepared it so that they can enjoy it even better.
End the process with cleaning the portafilter and the group head. It is paramount to clean the coffee maker thoroughly so that you can quickly brew espresso the next time without indulging in the hassles of cleaning.
Don’t Have An Espresso Machine? Try Out These Amazing Methods
If you don’t have an Italian espresso maker, don’t worry, you can still prepare amazing espresso. Here I have listed three different ways, so if one seems unfeasible, you can follow another one to make coffee.
How to Make Espresso Using the Aeropress Method
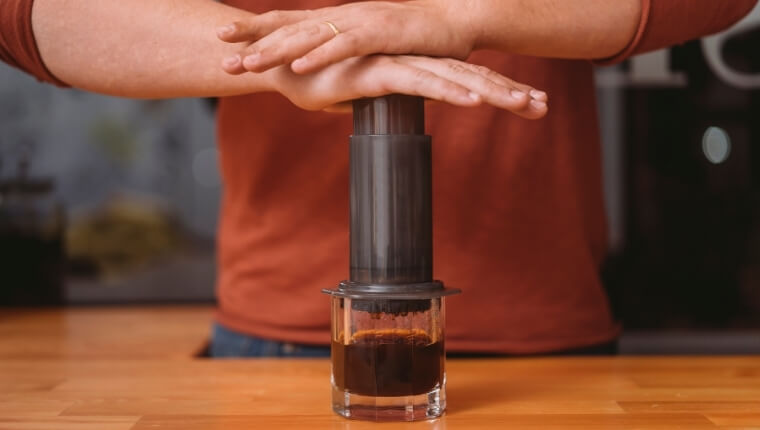
This is an easy way to make espresso coffee and doesn’t require a lot of equipment. I have tried the Aeropress Method several times, and I can vouch for the flavor of coffee you can get.
Compared to other methods of making espresso with an Aeropress is the most portable, and you can prepare espresso almost anywhere. Also, it’s a low-priced way that doesn’t involve buying expensive machines, so drinking coffee doesn’t have to be expensive.
Things You Need
- Water
- Coffee grounds
- Coffee grinder
- An Aeropress (I recommend AeroPress Coffee and Espresso Maker)
Once you have all the things in place, start following these steps to prepare espresso without an espresso machine.
Step 1: Process the Coffee Beans
Add the coffee beans to the grinder for fine grinding. Either you can use a burr grinder or an automatic grinder if you don’t feel like grinding manually. Add approximately two tablespoons of coffee for a smooth and rich flavor.
The grounds should be fine as table salt if you want to enjoy the real flavor of espresso coffee. Whether you are using a machine or not, the coarseness of the beans matters the most.
Step 2: Prepare the Aeropress
Now prepare the Aeropress, and put a paper filter in the lower basket. Pre-heating the brewer is essential, so put some hot water through the filter for warming it up. Preheating is essential to eliminate the paper flavor.
Get rid of the water and then put the basket in the bottom chamber. Add the coffee grounds to the Aeropress and shake the tube so that the grounds settle evenly.
It would be great to put one more paper filter on the top of the evenly settled grounds. Make sure to wet this paper as well, so there’s no paper flavor at all.
Step 3: Start Preparing the Coffee
The third step is the most exciting part of using the Aeropress method. Now you have to press the plunger gently. Push it all the way to the bottom and then retract it back. If the grounds should look similar to the coffee puck, then it shows that you have prepared the coffee properly.
Step 4: Add Some Hot Water and Push the Piston Again
Add some hot water to the top of the puck, and press the plunger again. The temperature of the water should be in a range of 200ºF – 208ºF. If you are finding it hard to decide how much water to add, then have a look at the Aeropress levels and add hot water up to level two.
Press the plunger slowly and squash the puck properly to churn out the flavor from the coffee grounds. Make sure not to press it too hard else, the water can burst out from the Aeropress.
Step 5: Enjoy the Coffee
Now it is time to enjoy the espresso you’ve made. Drink it hot, and then give a thorough cleaning to the Aeropress. Store it in a dry place so that you can enjoy drinking joe again when required.
Pros and Cons of Using the Aeropress Method
Pros
- It’s cheap as compared to other methods
- Making coffee is easy than using a fancy machine
- It’s a portable way to make coffee
Cons
- Making coffee takes time
- You cannot make multiple shots of espresso with an Aeropress
How to Make Espresso Using the French Press Method

Next on the list is the French Press Method, which isn’t as easy as Aeropress, but many espresso lovers prefer this method due to the flavor. I have seen many people using the French Press to make coffee.
A French Press looks similar to a thermo-sized beaker with a piston on the top. The piston runs through the machine and presses the coffee grounds to extract the flavor.
It is another affordable way to make espresso, as a good French Press can cost around $40.
Things You Need
- Water
- French Press
- Coffee grounds
- A bean grinder
- Whipped cream
Some folks even enjoy a shot of espresso with milky foam, but I prefer using whipped cream.
Step 1: Grind the Coffee Beans
The first step of making espresso with a French Press is the same as using the Aeropress method. You can either use a burr grinder or an automatic one to grind the coffee beans.
I don’t recommend using pre-ground beans as they aren’t that great for making flavorsome espresso. When grinding the beans, make sure that you aren’t grinding them too much.
Unlike the Aeropress method, the French Press doesn’t require finely ground beans. The grounds should be coarser so that the piston works properly and helps you extract the flavor inside the cup.
Step 2: Heat the Water
Use a kettle to boil the water so that you can pour it into the French Press. The water should reach the boiling point around 200 degrees Fahrenheit, as it is ideal for making espresso.
If the water isn’t too hot and is nowhere near to the boiling point, then you will find the coffee’s flavor bland, and we call it under-extracted in professional language.
Step 3: Add the Coarse Grounds to the French Press
It is the time to add the grounds to the pre-warmed French Press. After adding the grounds to the coffee maker, pour some boiling water, and let it cool for a few seconds.
You will experience a burst of aroma when the hot water touches the coffee grounds, enjoy the aroma, and see the grounds getting bloomed. Don’t wait for too long, as the coffee grounds may lose the flavor.
Step 4: Pour More Water and Start Stirring
Now pour the remaining boiling water into the French Press and start stirring. Stir it gently as being too rough can result in lump formation. Stir the mixture for around 25-30 seconds before you plunge into the next step of brewing delicious espresso.
Step 5: Step the Brew
This is an important step of making espresso with a French Press. Some folks believe that the longer you steep the brew, the better the flavor gets. However, it seems like a myth, so you shouldn’t believe it.
Steep the brew for around 5 minutes, as it is enough to bring out the flavor from the grounds. Don’t press the piston while steeping the brew. It would be great to use a timer when steeping the mixture.
Step 6: Push the Piston
Once you hear the timer alarm, it is time to push the piston. Hold the lid and press the piston gently so that it reaches the bottom.
I press the piston halfway and then bring it to press again in order to extract flavorful coffee from the grounds. Be gentle while pressing the piston, as being too quick isn’t a great way of brewing coffee with a French Press.
Step 7: Serve the Coffee
The coffee is now ready for serving. Pour the shots of espresso into cups, and add some whipped cream to the top. You can even use some milky foam if required.
Enjoy the coffee, and clean the French Press thoroughly.
Pros and Cons of Preparing Espresso with French Press
Pros
- You can prepare double shot of espresso
- It’s an easy and affordable method
- The French Press is portable
Cons
- It requires expertise in making a perfect cup of espresso
- Required additional equipment to boil water
How to Make Espresso Using the Moka Pot Method
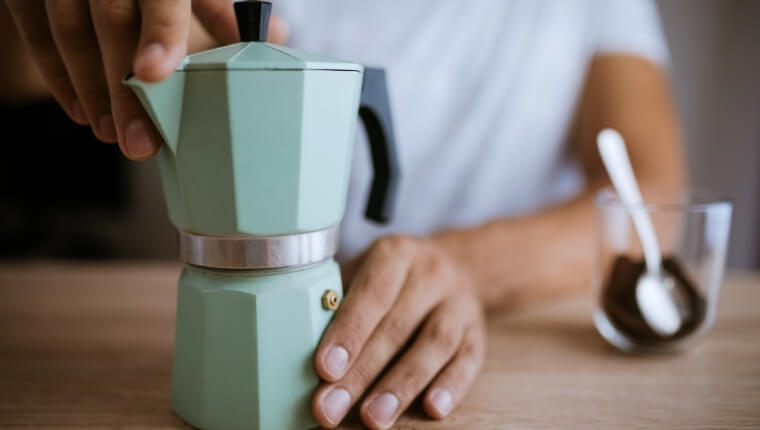
Often called the stovetop method to make espresso, the Moka Pot is another affordable method. The coffee made using a Moka Pot has a higher concentration and a punchy flavor similar to the espresso you get in a barista.
It is essential to use fresh espresso beans when using a stovetop. The working of a Moka Pot is simple, there are three chambers inside the stovetop.
The base boils the water, the middle one detains the coffee grounds, and the top chambers collect the coffee extracted from the beans.
Using stovetop t for brewing espresso is another inexpensive way, and you don’t need a hundred dollars espresso maker for it.
Things You Need
- Fresh espresso beans
- A bean grinder
- Cold filtered water
- A warm mug
- A Moka Pot (I recommend GROSCHE Milano Stovetop Espresso Maker)
Step 1: Grind the Beans
Start with grinding the coffee beans using a burr or an automatic grinder. For making espresso using a Pot, you need finely ground beans. The ground should look like table salt so that the stovetop helps in extracting the true flavor from it.
As per coffee experts, the pressure built inside the Moka Pot passes easily through powdered grounds when compared to coarse grounds. Keep grinding the coffee beans until they get powdery.
Step 2: Pour the Cold Filtered Water in the Moka Pot
Now pour the cold-filtered water to the bottom of the Moka Pot. Sometimes I use pre-heated water, and sometimes the regular cold water. The choice is up to you.
Make sure you aren’t overfilling the bottom chamber, as there should be enough space for the pressure to build up.
Overfilling the Moka Pot with water can result in an explosion.
Step 3: Fill the Filler Basket with Coffee Grounds
Add the coffee grounds to the filler basket, and shake it gently so that the grounds settle down evenly. You can even use your finger to level the beans, but don’t be too hard as the water will not pass through beans packed together tightly.
Remove the extra grounds from the top and then put the coffee basket into the bottom chamber.
Step 4: Assemble the Moka Pot
It is time to assemble the Moka Pot. Screw the top spout with the bottom chamber. Don’t be too rough with it, as overtightening the Moka Pot can lead to breakage.
Step 5: Place the Pot on the Heat Source
Now place the Moka Pot on the heat source to brew espresso. It is easy to determine how much heat is essential, and you can figure it out quickly. If the coffee flows out of the spout, then the heat is too much, whereas if the coffee barely moves in the pot, then the heat is very less.
Adjust the level of heat as per the requirements and then leave the top lid open for brewing coffee. The handle of the pot should be far away from the flame, else it can result in burn marks when you pour the coffee.
Step 6: Wait for the Gurgling Sound and then Remove the Moka Pot.
The pressure generated inside the Moka Pot will push the coffee to the topmost chamber, which is the collection chamber. You’ll hear gurgling sounds once the coffee starts reaching the top chamber.
Furthermore, the aromatic steam will start coming out of the spout, indicating that the coffee is ready, and you should remove the Moka Pot. Remove the pot, and close the lid so the pressure remains inside the coffee maker.
Step 7: Serve the Coffee
The coffee is now ready for pouring into cups, so get some cups, and do the honors. You can even dilute the coffee if required using water. Serve the espresso coffee and enjoy it with your friends and family.
The last step, as usual, is cleaning the Moka Pot. Make sure that the pot is cool before you start cleaning it. Don’t know how to clean a Moka Pot? Here’s a video you should watch to learn to clean it properly.
Frequently Asked Questions: How to Make Espresso
Can I make espresso without coffee machine?
Yes, you can make espresso even without a fancy machine. Just follow any of the three methods listed above: Aeropress, French Press, Moka Pot to make espresso at home.
Can you make espresso with regular coffee?

Yes, you can use regular coffee to make espresso, but there will be a huge difference in terms of taste. If you want to enjoy a shot of espresso that tastes like barista coffee, use special espresso roast or dark roast coffee beans
Is espresso the same as coffee?

Espresso is a bit different than your regular cup of coffee. It’s a special type of coffee with a caffeine level on the higher side. It tastes bitter than regular coffee, and the way how the espresso is made is also different. The secret is that you need to grind your coffee beans to a fine, salt-like consistency to have a perfect espresso shot.
What ingredients do I need to make an espresso?

The ingredients you need are: espresso beans, water, an espresso maker, a coffee filter, and a mug to enjoy a shot of espresso. Read this “how to make espresso” guide to know more about the ingredients and the methods to make espresso.
Don’t miss out: Can you drink espresso coffee with braces?
Conclusion
Now you can make espresso without a machine, so it doesn’t have to be expensive. Just choose the method you want to use, gather all the ingredients and equipment required for it, and start making great-tasting coffee right away.
This how-to-make espresso guide contains four ways, including one with an espresso maker. So, folks, that’s all you need to know about preparing espresso.


